Tuesday, November 29, 2011

Proscuitto Pears and Bleu Cheese Drizzle!


Here's another quick appetizer recipe that everyone loves.  I did have one person say that they tasted better when they cooled, but the bleu cheese drizzle needs to be warm to not be clumpy.  I'm sure there's a happy medium somewhere in here, but you'll have to find it for yourself!


I don't have a picture of the final product because I was busy when I served it, 
but I'm sure you could use your imagination!

Sunday, November 27, 2011

Can-Do Attitude: Bread & Butter Pickles!

Thomas suggested trying pickles the other day.  I haven't ventured in this realm before (ie: non-fruit canning), but I'm always willing to give a good recipe a try.

That being said, we couldn't agree on dill pickles (which he enjoys), or bread and butter (which I adore).  Obvious, I'm going to do both, but the B&B's sounded easier, so that is where I started.

Oh, and I love any excuse to use my crinkle cutter!
This recipe was found in Canning for a New Generation.  While there are literally a ton of recipes for pickles out there, I liked this one for using honey instead of sugar.  I'm not such a fan of adding onions, but I thought it would help with the overall flavor.

Honeyed B&B Pickles - made8 pint jars for me
Ingredients:
3 lbs pickling cucumbers (3-4" long)
1 pound small onions (about 2)
1/4 cup + 1 T kosher salt
2T yellow mustard seeds
1T celery seeds
1-2t of crushed red pepper flakes
6C apple cider vinegar (5% acidity)
3/4C mild honey
1 1/2t turmeric
1 1/2t dry mustard powder

To start, cut the ends off of your cucumbers, then cut into 1/4" rounds.  Cut your onions into quarters, then slice into thin half-circles.
Put cucumbers and onions in a large bowl, sprinkled with 1/4 C salt, tossing to combine.  Cover with a layer of ice cubes and refrigerate for 8 hours or over night. 

The next day, pick out any ice, drain well, and rinse under cold running water.  Then, toss with mustard seeds, celery seeds, red pepper flakes, then set aside.
 In a non-reactive (stainless) pot, combine vinegar, 1 1/2 C water, honey, turmeric, mustard powder, and 1T salt.  Bring to a full boil.

Working quickly, place your cucumbers and onion mixture into your jars (not too tightly).

Ladle the hot vinegar mixture into each jar, leaving 1/2" head space at the top.  Wipe the rims, place on your vacuum seal lids on, then screw down the rings until finger tight.  Finally, boil for a full 15 minutes.  Remove and let sit for 12 hours.  (Check after 1st hour to make sure the seal has set, if not, refrigerate that jar and use ASAP.)


Saturday, November 26, 2011

Taste of Sweetness Saturday: Pistachio Thumbprint Cookies

Have I ever mentioned how much I LOVE HOLIDAYS?  Doesn't matter which one, or why we're celebrating, but themed food is (obviously) something I adore, and it reminds me of my family and happy times together.  My family's big holiday together is Thanksgiving, which makes me cry being 2000 miles away from them on the big day.  My mother's (huge-ish) family all comes together and makes miraculous food!  The one holiday that my mother does in a big bad way, however, is Christmas.  There is cooking and baking galore, parties, get-togethers, and gorge-athons to melt my heart.  My folks are coming to California to join me this year, and I'm so excited.  So... as part of my preparation, I'll be sharing my favorite cookie recipes that I've taken from my mom, from friends, family, random websites, etc., because if there's one thing I love to do during the fall and winter, it's bake!

First up - from my mom - Chocolate Pistachio Thumbprints!  Be forewarned, this recipe takes a sizeable chunk out of your day, but it's extremely worth it in the long run!

Cookie Ingredients:
1/3C Powdered Sugar, 1 tsp vanilla, 3 1/2 oz pkg. Instant pistachio pudding mix, 2 C flour, 3/4 C finely chopped nuts, 1 C softened butter, 3/4 tsp almond extract, 1 egg, and 1/2 C semi-sweet chocolate chips.

To start, heat your oven to 350 and lightly grease your cookie sheets.
Next, cream together the powdered sugar, margarine/butter, vanilla and almond extracts, pudding mix, and egg until well blended.  Then, by hand, stir in flour and chocolate chips until well blended. 
Shape dough into 1 inch balls, and roll in the nuts.  Then, place 2 inches a part on your cookie sheet an place a thumbprint to indent the center of each cookie.  Bake 10-14 minutes, or until the edges start to turn a light golden brown.  Let cool one minute before removing from the cookie sheet.
 
Filing ingredients: 1 1/2 C powdered sugar, 1 tsp vanilla, 2 T softened margarine/butter, and 1 to 3 T of milk.

As the cookies are cooling, combine all filling ingredients in a small bowl and mix until smooth.  Then, place a scant teaspoonful of the filling into each cooled cookie thumbprint.  Be careful not to overflow!

Glaze ingredients: 1/2 C chocolate chips and 2 tsp shortening.

Melt the glaze ingredients together in the microwave or in a small saucepan over low heat.  Then, drizzle about 1/2 tsp of chocolate glaze over each of your cookies.  Allow your filling and glaze to set completely before storing your cookies, otherwise you'll have to store them side by side, and not stacked with wax paper.

Thursday, November 24, 2011

Happy Thanksgiving!

This idea is completely stolen.  Completely.  Yes, I find recipes all the time, but really?  This one goes back to when I was a kid.    My aunt does Thanksgiving better than anyone I've ever met.  I hate missing it.  EVER.  That's why today is awful when I'm so far away.

However?  Making this craft at work the other day brought me back to my childhood.  With 7 siblings, my mom's side of the family has a huge Thanksgiving feast.  More turkeys, bread rolls, and pies than you could every hope to count or eat in one sitting.  That's why three to four hours later we're at it again.  And it ROCKS.  Seriously.  What I remember from being little, however, is making turkeys out of cookies the night before.  I remember my aunts working hard to prep for Thanksgiving dinner and us kids needing something to do.  So one of them came up with this, or found it from somewhere.  Regardless, it has stuck with me through the decades, and when I was looking for a craft project, it's the first thing that went through my head.  I just Googled the rest to figure out how I could recreate the memories...

Enough shmoop.  On with the scoop!

First, you'll need some ingredients:

per bird...
Oreo cookies (2)
Chocolate Frosting (<1 tsp)
Reese's Peanut Butter Cup (1)
Caramel Candy Corn (1)
Standard Candy Corns (4-6)
White Sprinkles (2)


First, you'll need to flatten one edge of one of your Oreos as well as as one edge of your PB cup.  this isn't strictly necessary, however it'll help your process.

Next, place a dab of frosting on those flattened edges to adhere them to your base Oreo. Then, use a dab under the caramel candy corn for your head/beak.
 Next up comes the feathers.  You can scoop some frosting into the cookie to help them stick, or you can ever so gently push the tips of the corns into the Oreo filling.  The Oreo cracks extremely easy, so you need to be careful with this step.

Then, a little frosting to adhere your sprinkles, and use that dab that's left on your finger for the pupils (as one 6 year old told me yesterday!).

You can also use orange frosting for feet or legs, but I didn't want to buy for such a small group of turkeys!

Also?  Just when you think you have it figured out?  Someone goes and shows you up.  I received this from one of our vendors within hours of making my turkeys.  Unbelievable!!


Super cute though, right?  Just use a ginger snap, peanut butter cookie, jelly beans, a full sized PB cup, candy corns, black sprinkles, and white frosting.  This seems to be way more time consuming than the ones I made, but I was making mine with children 6 and under.  We're far more basic!!

Tuesday, November 22, 2011

Cranberry Feta Pinwheels

Here's another super easy recipe.

My mom has made a variety of pinwheels throughout the years, and when I saw this recipe I thought of her and decided it was nicely Fall-ish with all the right ingredients to be delicious!

I didn't add any milk to make my cream cheese "spreadable."  It was already soft and seemed pointless.   I did use a mixer, however, to mix all of the ingredients well.

I used both regular flour tortillas and the garden herb wrap tortillas.  I loved the garden herb - it smelled and tasted yummy!
Spread it thick, leaving two opposite edge dry since you'll be cutting them off anyway to make even pinwheels.

Then, wrap in plastic wrap and put in the fridge until you're ready to use them.

Cut them, make them pretty, serve them up.  Even though I'm not a Feta fan, AT ALL, I really though that all of the different tastes complimented each other well.

Sunday, November 20, 2011

Can-Do Attitude: Pear Preserves

Preserves are different that sauces, butters, or jams.  Preserves contain large pieces of fruit, and when you remove preserves from the jar, they don't retain any shape (other than that of the fruit).  A jam and a jelly will hold its own shape on a spoon, but a preserve is thinner.  The fruit is mostly translucent (after being cooked), and it's in a sweet sauce, mostly from a simple syrup, or similar concoction.

For pear preserves, you'll need 3 cups of sugar, 3 cups of water, 5 peeled/cored/sliced pears, and 1 medium seeded and thinly sliced lemon.

To start, take your water and 1 and 1/2 cups of the sugar and boil it for 2 minutes in a large pot.  Then, add your pears (I peel, then use an apple corer to core and slice) and boil them gently for 15 minutes.

Then, add the rest of your sugar and lemon, and boil until the fruit is transparent.

Then, cover and let stand for 12 to 24 hours in a cool place.  Since it's fall, I just left mine on the kitchen counter.


Fast forward to the next day...


Take out the fruit from the syrup and place into your jars.  One batch will take 5 or 6 jars.  (Here, I doubled the recipe and made 11 jars.)


Since the fruit is not cold, but room temperature, you don't have to worry too much about the glass breaking.  Always be mindful about big temperature changes since you're apt to make a bigger mess than you anticipate.

Boil the remaining juice for about 10 minutes to thicken.  Remove from heat, and skim off any foam as necessary.  Then, ladle the hot juice into the jars.  To process, add to boiling water (covering the jars by at least 1" of water) and boil for 20 minutes.  Then, remove to cool and let set.  Always wait at least a day before serving.

Tuesday, November 15, 2011

Pumpkin *Quiche*

So many good things start with bacon...

Like this Pumpkin Quiche!
Instead of puff pastry, I just used the crescent roll dough sheet and a biscuit cutter to make it muffin pan size!
Mix everything together - with only one egg!  This is where I have to give the speech that this quiche is kind of a "quiche" because it really doesn't contain a lot of the materials that you associate with a quiche.  For example, there's only one egg in the whole thing.

True story.

Well, not quite.  I double the recipe so I used two eggs, but still...
The dough came up about halfway, and then I put a heaping teaspoon of the filling in each cup.  The recipe made 24 this way, which was nice, because I was serving 40, so doubling was perfect for me.

I loaded them into the muffin cups and cooked them at 360 for 12-14 minutes, or until the edges of the dough started to turn golden.


See?  Golden, right?  Easy enough.  Any they were super tasty.  I used a nice smoked Dorset cheese (cheddar like) and it worked out perfectly.

Sunday, November 13, 2011

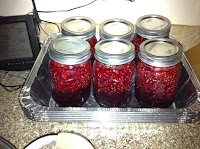
Can-Do Attitude: Black and Red Jam

Ginormous blackberry!
My signature jam?  Black & Red, combining blackberries and raspberries into a wonderfully jammy goodness!

Next to apple sauce, a simple jam is a piece of cake.  Jelly is difficult because you have to strain, but a jam is is just mash, solidify, and jar!

Black & Red recipe:
1 quart crushed blackberries and raspberries
1 pouch of liquid pectin
6 1/2 cups of sugar (yikes, right?!  substitute splenda or sugar equivalent at will...)

First, put your quart of fruit in your pot.

Then, use a potato masher (or whatever you have) to mash the fruit.  I leave it fairly coarse since it'll cook out nicely as you go through the process.

Then, add your 6 and 1/2 cups of sugar.  All jam recipes require a boat load of sugar.  I like using the Splenda Sugar Blend because it cuts the requirement in half, but it's still a lot sugar.  If you want it to taste nice, then you do it.

Once you have it mixed together, bring to a boil until all of the sugar dissolves.  Then, add one pouch of liquid pectin, and bring to a hard boil for one minute.  Be careful because you can easily foam up and boil over.


Skim off any extra foam from the top of the pot to keep your jars clean. 

Turn the heat off the pot after a minute of boiling.  Then, load into your hot jars with at least 1/4 inch of space before sealing with your vacuum sealing lids.


To process, place your jars in a large boiling pot of water, covering the jars by at least one inch of water.  Leave in the boiling water for 10 minutes, remove, and cool. It takes about 24 hours or so to set up the jam, but after that, serve up and enjoy!
Chunky delicious-ness!!

Saturday, November 12, 2011

Taste of Sweetness Saturday: Salted Caramel Brownies

Happy Half-Birthday to Me!!

Last year, I found this recipe for Salted Caramel Brownies over at the Brown Eyed Baker.  (She's amazing, check her out!)   I've made toffee (recipe coming later in the month), but I didn't have a lot of patience for browning the ingredients, so I was a little intimidated to make my own salted caramel.

However, I love me some Ghirardelli Double Chocolate brownies, so I thought I'd make a trade off.  I'll use the box mix (of course, when don't I??) and then make the caramel and insert it into the recipe as needed.


At first, I looked at the caramel recipe and thought, 'really?  Just put sugar in a pot??' But I followed the directions, and sure enough, the sugar melted.  I took it until it was a nice amber color.  If you look at the picture to the left of this paragraph, look to the bottom right of the whisk.  That's probably the best judgement of how deep of an amber I went.  Then, I whisked in the salt, and followed that with the room temperature butter.

By this point, my thumb was cramping from whisking so much!  But, I kept moving, removed the sauce from heat, added the cream, and stirred until we got to this point.  Then the BBE said to let it chill for 10-15 minutes.

This is where I put it aside and worked on following the brownie box mix.  I followed the "thick" brownie route, as per usual, because I'm not a fan of the "cake brownie."
I lightly greased the 8x8, and poured half of my batter into the Pyrex. 

Nice and thick, but not a lot of batter.  I know I didn't want cake, but there better be enough for at least 10 people!!


Then, I made my 9 dollops of caramel on my half layer.  I used about a teaspoonful for each dollop.

Then, I covered this with the second half of my mix and made 9 more dollops on top.  These were far less orderly and discriminate in their placement because I knew there would be 16 brownies cut from here and I didn't want anyone to feel gypped. 
Here,I took a butter knife and lightly swirled the top of the mix, zagging left and right, and then up and down to create this mostly random pattern.  Then, I sprinkled a little sea salt over the top.

I popped it in at 325 and baked it according to the box's directions.  Both the BBE and Ghirardelli said to not over bake.  When inserting a toothpick, there should be a little  that still comes out with it. The brownies sit for 2 hours in the pan so they "finish up" before being cut.

Fair enough. 
The swirls and salt and REALLY noticeable when they come out of the oven! 

The biggest problem with these brownies? You need to make a double batch, because they'll go FAST!!