Showing posts with label peanut butter. Show all posts

Monday, April 8, 2013

Snickers and Mars bars

 Here's to the mighty Snickers bar, and here's to making it (sort of) by yourself (sort of) at home (sort of)!!

I know I've talked about this recipe once before, but I found myself making two batches this month, one with peanuts (like a Snickers) and one without (like a Mars Bar).

So, if you ever really wanted to know what's involved in making your own, here's the (less than) skinny on the process.

(And maybe this will be my last set of parentheses!)
Bottom Layer Ingredients:
1 1/4 cups milk chocolate chips
1/4 cup peanut butter

Nougat Layer Ingredients:
1/4 cup unsalted butter
1 cup granulated sugar
1/4 cup evaporated milk
1 1/2 cups marshmallow fluff
1/4 cup peanut butter
1 1/2 cup salted peanuts chopped, roughly chopped
1 tsp vanilla extract
Caramel Layer Ingredients:
1 14-ounce bag of caramels
1/4 cup whipping cream

Top Layer Ingredients:
1 1/4 cups milk chocolate chips
1/4 cup peanut butter

It's really not a lot, this process just TAKES TIME since every layer needs to cool enough to hold its own before you add another one on top of it.  I'd plan on at least an hour per layer, even if you use the fridge, because you really want that pretty set of layers to come out evenly when you're down.
 Directions (Bottom Layer):
1. Buy a 9x13 disposable pan and spray it with a non-stick cooking spray.  You really want disposable and you really want to grease it up.  Trust me on both.  It makes the final steps the easiest.
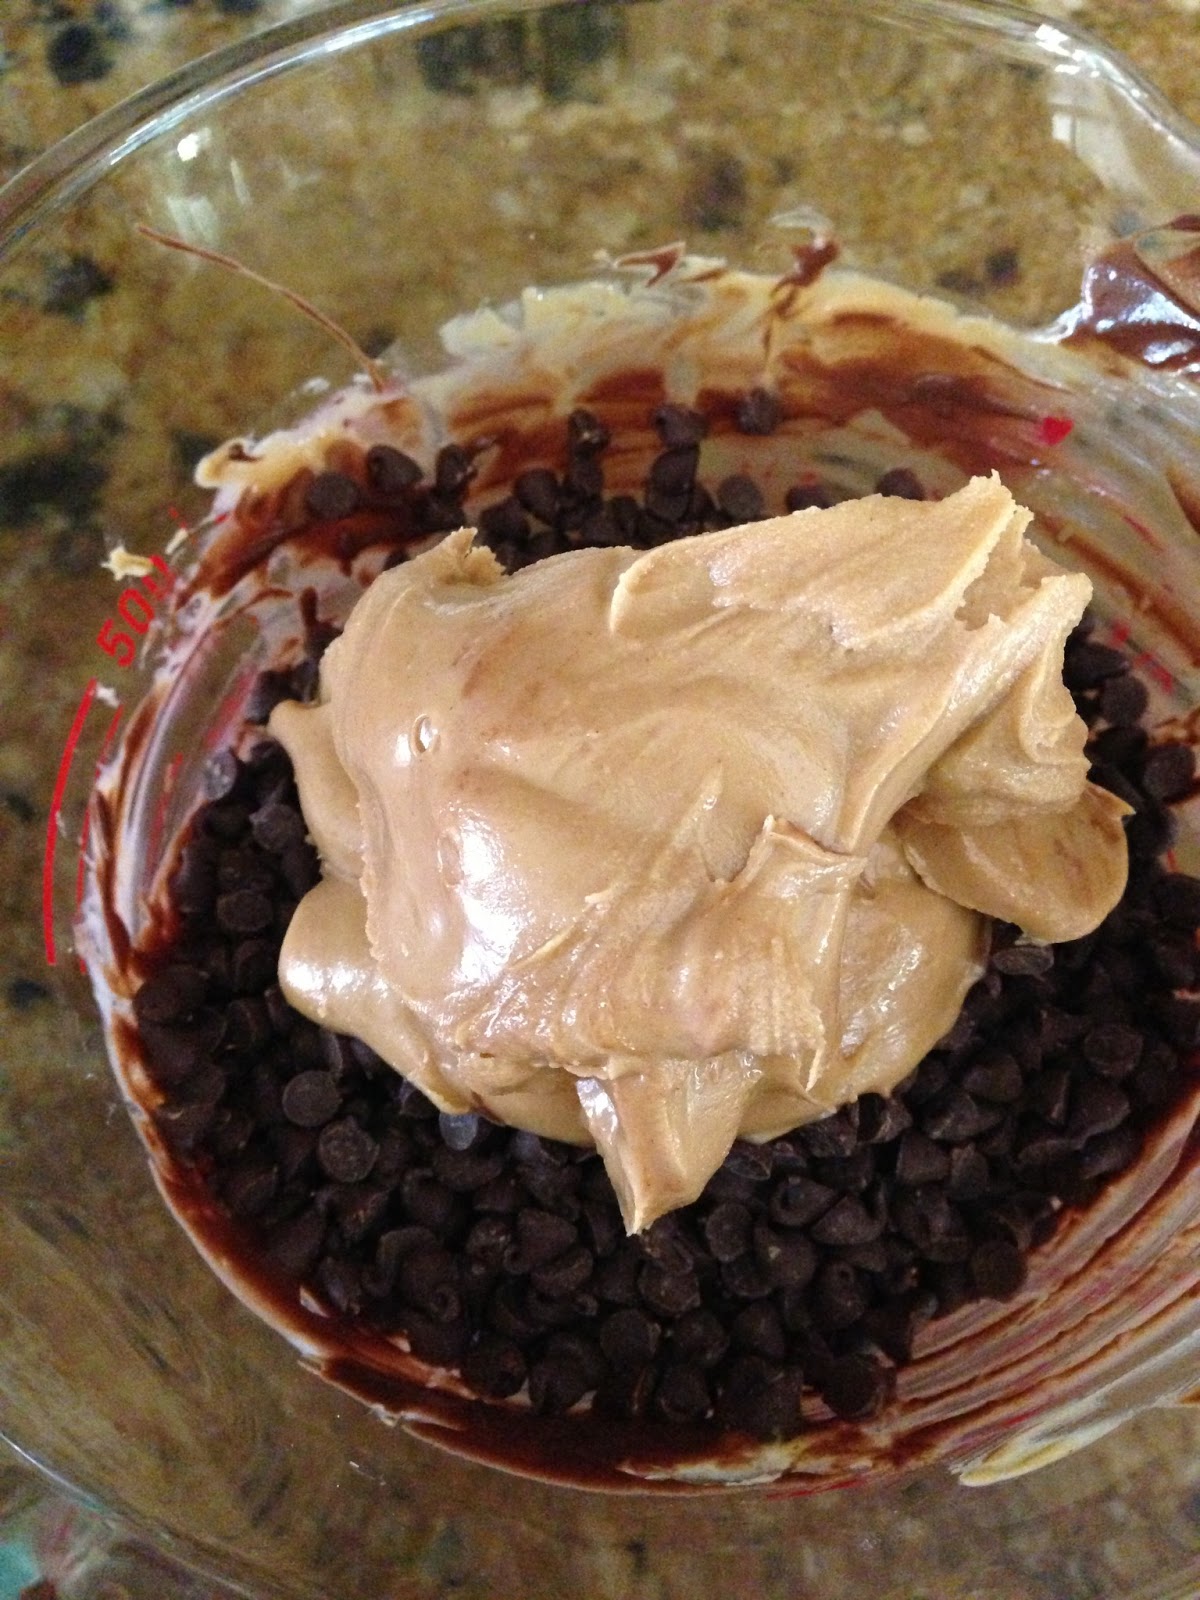
2. In a microwave safe dish/measuring cup, melt together the bottom layer ingredients over 90 seconds, stopping every 30 seconds to stir, or until completely melted and combined.
3. Spread out melted PB chocolate goo into prepped disposable container, set in fridge to solidify.

Directions (Nougat Layer):
1. Melt butter in your pan over medium heat, then add your sugar and milk and bring to a boil.  Stir well so everything dissolves nicely.
2. Cook for about five minutes, still stirring from time to time.
3. Add fluff, PB, and vanilla - keep stirring!  Make it smooth.

 4. Turn off the heat and fold in the peanuts (for Snickers), or don't (for Mars bar)
5. Pour and spread over cooled and set bottom chocolate layer.  Stick that puppy back in the fridge for another hour.

Directions (Caramel Layer):
1. Combine caramels and cream in saucepan over low heat.  Stir until smooth (10+ minutes).
2. Pour over nougat and return to fridge for another hour.


 Directions (Top Layer):
1. In a microwave safe dish/measuring cup, melt together the bottom layer ingredients over 90 seconds, stopping every 30 seconds to stir, or until completely melted and combined.
3. Spread melted PB chocolate goo on top of other three set layers.  Put back in fridge to solidify one final time.

 Directions to Serve:
This is the part where you're really thankful I told you to use a disposable pan...

First, peel back the edges if your pan.  You'll see how nicely the layers have set, making it super simple for you to take them out of the pan.

I just flip it upside down and peel off the bottom.  The flexibility of the disposable pan helps.  If you're super-anti-disposable pan, then try to use a silicon one or something with equal amounts of flex.

 Next, take your nicely sharpened knife and cut it up.  You can make bars, squares, or whatever your heart desires.  I'd store them in the fridge because the chocolate will go soft if you leave it out too long.

When I make a double batch (two 9x13" pans), I can keep them in the fridge for about two weeks and they still taste amazing.  I can't vouch for longer than that because they really won't ever last once people have tasted them.


Try it.  You'll never want to go back to your standard Snickers/Mars bar again.  I promise.

Monday, December 3, 2012

Chocolate Peanut Butter Pretzel Bites

Holy AMAZING, Batman!

If you're looking for a simple dessert that is both sweet and salty, I've found your kryptonite.  Or your salvation.  I guess it depends on which comic we're reading because now I'm confused!  ;)

Ingredients:
2 C creamy peanut butter, divided
3/4 C butter, softened
2 C powdered sugar, divided
4 C broken pretzel twists, divided,
2 C semi sweet chocolate chips, divided
Directions:
1. Line a 9"x13" baking pan with foil and a little overlay.  Lightly spray with a non-stick cooking spray.
2. Beat 1 1/4 C peanut butter in and butter in a large bowl until creamy.  Gradually beat in 1 C powdered sugar.
3. Stir in remaining 1 C of powdered sugar, 3 C of pretzel pieces, and 1/2 C of chocolate chips.  Press evenly into prepared baking pan.
4. Microwave remaining 1 1/2 C chocolate chips and 3/4 C peanut butter on medium, uncovered, in a microwave safe bowl for 45 seconds.  Stir. If necessary, return for 10-15 second intervals until completely melted.
5. Spread chocolate peanut butter evenly over pb/pretzel/powdered sugar layer.
6. Top with remaining pretzel pieces, pressing down gently into the chocolate layer.
7. Refrigerate at least three hours, or until firm.  Lift out of pan and peel off foil, then cut and serve.

Wednesday, September 12, 2012

PB Chocolate Banana Bites

Ready for an awesome snack or dessert that can make your day?

So simple, and it's only three ingredients.

THREE!!

Kasie!
Ingredients:
Bananas
Peanut butter
Chocolate Chips

Directions:
1. Slice bananas into 1/4" slices.
2. Place about 1 tsp of peanut butter on one banana slice, and cover with a second slice, creating a sandwich.  (More or less, depending on preference)

3. Melt chocolate chips (about 1 c at a time) in the microwave, stirring every 30 seconds until smooth.
4. Dip PB banana sandwiches in the chocolate.  My lovely assistant of the day, Kasie, found it easiest to hold each sandwich on a fork (resting on top, not pierced) and then use a spoon to drizzle the melted chocolate on top.
5. Stick in freezer on parchment paper until ready to eat.


While these didn't turn out pretty, once they came out of the freezer, they looked more 'normal', and it didn't matter much, since everyone devoured them.

Literally.

DEVOURED.


Monday, September 3, 2012

S'moreful September: PB S'more Brownies

It was only a matter of time before peanut butter was added to this mixture.  This recipe appeals to me for its simplicity, and the way you combine the peanut butter into the mixture to make you feel better about your life.  It's protein, it's healthy, right??

Ingredients:
1 box of your favorite brownie mix (plus it's ingredients, usually oil, eggs, and water)
1 jar (7.5oz) of marshmallow creme
1 C of your favorite creamy chocolate frosting
1 C of your favorite peanut butter

* See how this recipe is bound to be your favorite?  Three of the ingredients are your own personal favs!*


Directions:
1. Make, bake, and cool your brownies in a greased 9"x13" baking pan.  Usually the recipe calls for up to
a 8x8 size, so this will bake in less than half that allotted time.  Watch the brownies, use a toothpick.  You should know what you'd like your brownies to look like.
2. Drop spoonfuls of the marshmallow creme on top of the cooled brownie.  Lightly spread the fluff around.
3. Melt the frosting in a microwave safe bowl.  Pour and spread over the fluff.

4. Melt the peanut butter in a microwave safe bowl.  Pour and spread over the chocolate.
5. Using a knife, spread around the chocolate and peanut butter to marbleize it.
6. Cool in the fridge until more firm.  Cut and enjoy!

OH SO GOOD!!!

Saturday, July 14, 2012

Of Pinterest (and other time fillers...)


 So, the 8 gagillion people on Pinterest have already seen this.

But I wanted to try it out.

Ingredients:
Favorite cookie dough (PB Chocolate Chip)
Favorite candy bar (Reese's PB Cup)
Favorite brownie mix (Ghiradelli Triple Chocolate)
Directions:
1. Pre-heat over according to brownie mix
2. Line/grease muffin pans
3. Push in your favorite cookie dough (halfway)
4. Place your favorite candy bar in the middle
5. Top with brownie mix
5. Bake according to brownie box directions.

It took awhile for these brownies to set, so we left it longer than the box directed, but they were amazing just the same!


Wednesday, July 4, 2012

Happy Fourth of July!

 Let freedom ring my friends!

Today, at least in my case, that means not doing a red, white, and/or blue themed post.  It means I have the right to choose what I post about.  I mean, this is America, right?  We like to stand behind our rights, so that only makes sense.

And, actually?  I just don't have any red, white, or blue themed recipes that I want to share at this moment.  But, what I do want to share is awesome, just the same.
 Today, we're talking about Chocolate Cupcakes with a Peanut Butter-Cream Frosting Dipped in Chocolate.

Yes, those capital letters were absolutely necessary.  I feel as though I should be yelling how much I LOVE THIS RECIPE!!!  But, let's try to keep ourselves contained, at least a little bit, right?

First off, start with your favorite chocolate cupcake base.  I really love the base I used for the Oreo cupcakes (minus the Oreo). You could use your own favorite or even a box mix.  I won't tell.
 To me, the glory here comes in the top half of the cake, so that's what I'm going to focus on.

Peanut Butter Cream Frosting Ingredients:
1/2 cup granulated sugar2 large egg whites
1/8 teaspoon salt
12 tablespoons softened unsalted butter,
cut into 1/2-inch pieces
1 cup peanut butter
2 teaspoons pure vanilla extract
* this only covers about 12 cupcakes *


 Directions:
1. Combine sugar, egg whites, and salt in bowl.
2. Set bowl over pan of simmering water. Gently whisk until mixture registers 160 degrees F on instant-read thermometer. (I just went until it's warm to the touch).
3. With whisk attachment on your mixer, whip on medium-high speed until mixture resembles consistency of shaving cream.
4. On medium speed, add butter one piece at a time, until combined and creamy.
5. Whip in peanut butter and vanilla, and beat until smooth.
6. Using a zip lock bag, or a nice frosting bag and tip, pipe on that frosting, and let it go high.  Looks aren't necessarily important since all imperfections will be covered with the chocolate dip.  You could also just stop here and have a great recipe for PB Cream Frosting on Chocolate cupcakes, but why stop when you know it can only get better?
7. Place frosted cupcakes in the fridge for at least an hour to let the butter cream harden.


Chocolate Dip Ingredients:
8 ounces semi-sweet chocolate chips
1 1/2 tablespoons vegetable oil
* this only covers about 8-12 cupcakes *

Directions:
1. Melt chocolate and oil together (in microwave or through a double boiler approach)
2. Dip cold cupcakes directly into the chocolate.  It helps if you have a tall, relatively skinny container for the chocolate. Cover all of the butter cream frosting.
3. Let harden in fridge and enjoy!

Saturday, June 23, 2012

PB Pretzels Dipped in Chocolate

Have you ever just found a recipe and knew (from the very instant you spotted it) that you need it?

Now?!!

That's how I felt about this one.

It has all the ingredients to fulfill my every snacking desire, and the recipe is so simple that you could do it every day.

But we won't.  We're stronger than that, right?
 Right??

Well, okay, maybe not, but this is definitely a great treat to try out.  It makes a lot (50?  100??  Depends on how big you want them to be), and as long as there are no peanut allergies, everyone really loves them.

I made them as an airplane snack for my husband, and left a ton in the work fridge for my assistants.  They all ferreted one out for themselves and then asked permission to try one.
Every single one looked guilty when I immediately asked them how the first one tasted.  No one is that slick, but these are that good.

Ingredients:
1 cup creamy peanut butter
2 tablespoons softened butter
3/4 cup powdered sugar
3/4 cup brown sugar
Pretzels (any shape, just relatively small) or Wheat Thins (more crunch, less salt)
1 bag semi-sweet chocolate chips


Directions:
1. Cream the butters.  Add the sugars.  Blend well.
2. Make a small ball of the PB mixture, place on one pretzel/WT.  Sandwich it with another pretzel/WT.
(I actually just scooped the mix onto one pretzel and adjusted it as necessary while sandwiching them together.  Whatever works).
3. Melt one bag of chocolate chips in the microwave (about 2 minutes, stirring every 30 seconds).
4. Dip PB sandwiches into the chocolate and set on parchment paper to solidify.  I suggest placing a full tray into the freezer for 5 minutes to get to snacking sooner.
5. These keep well in the fridge, but I also sent some in a bag on a plane and they made it out just fine!

Wednesday, June 20, 2012

Cheesecake in a Jar!

There have been a ton of posts on Pinterest lately that have included cooking in Mason jars.  Obviously, I loved creating a cocktail in one, why not cook??

I'm not a huge cheesecake person, but I love chocolate and peanut butter, so when I found this recipe for a peanut butter cheesecake on an Oreo crust with a Nutella topping, I was sold!

So, first of all, start with 12 (4oz) mason jars.  (And, yes, they are oven safe.  My mother pestered me, worried, several times over about this.)
Oreo Crust Ingredients: 
16 Oreo Cookies, ground in a food processor
3 Tblsp Butter, melted
Pam Baking Spray (spray all jars with it)

Peanut Butter Cheesecake Ingredients:
12 oz Cream Cheese, at room temperature
7.5 oz container Creme Fraiche (or sour cream)
3/4 Cup Sugar
2 Eggs
1/4 Cup Heavy Whipping Cream
1/3 Cup Peanut Butter
1 tsp Vanilla Extract

Nutella Topping:
1/2 Cup Nutella
1/4 Cup Heavy Whipping Cream   
Crust Directions:
1. Decimate the Oreos in a food processor, and place in a separate bowl.
2. Melt butter and then drizzle over the Oreo crumbs.
3. Mix well.
4. Divide the Oreos among your Pam-ed jars, then press the crumbs down firmly.
5. Place the jars in a lipped pan, and then place them in the fridge to chill out (literally) while you make the cheesecake.

*For those gluten free-ers, just omit the crust.  Still amazing!
 Cheesecake Directions:
1. Preheat your oven to 325 degrees.
2. Using your mixer, blend the cream cheese, creme fraiche/sour cream, and sugar until smooth.
3. Add the vanilla, cream, and peanut butter, and beat until smooth.
4. Beat in the eggs one at a time until just blended.
5. Add your cheesecake filling to your prepared crusts.  I filled mine up to the threads (where the lid screws on).
6. Fill the pan that your jars are sitting in with water.  The jars should have between 1/4" and 1/2" of water surrounding them (basically enough to cover where the crust is).
7. Bake your cheesecakes for about 30 minutes.
8. Remove from the oven and onto a cooling rack or safe surface to help them cool.
9. Once the jars have completely cooled, you can put the lids on and transfer them to your fridge.


From there, they can sit for a night or more.  There's something about time in the fridge that generally helps cheesecakes
The cheesecakes rose nicely in the oven, but they did settle back down as they cooled, leaving enough space for the topping.

I made my cheesecakes on a Friday morning and didn't take them out of the fridge until Sunday morning.  They were perfect.

When you're ready, put the Nutella (1/2C) and heavy whipping cream (1/4) in a microwave safe bowl/measuring cup.  Zap it for a minute or two, stopping twice to stir it.
Once the Nutella and cream have combined for a tasty topping, add it to your cheesecakes, filling the jar the rest of the way.  Then, return to the fridge to set until you're ready to serve up these delicious bad boys.

I left a slight gap at the top so I could place a cupcake cover over the top as a lid before closing the ring around the jar.

These are the perfect size for a picnic, or an individual portion for yourself for days to come!

Literally.  I ate one a day for about 5 days.  AMAZING.
Post-lunch snack at my desk!

Wednesday, May 30, 2012

Fudgy Peanut Butter Bites

 This is such an easy "cheater" dessert.  If you love the chocolate and peanut butter combo, you might just be thanking me with this one (and it's feasibly done within 15 minutes!)  Of course, you could make it more from scratch, but half the fun is how easy this is.

My ingredient list:
1 pkg. peanut butter cookie dough (I could only find it with chocolate chips, but who hates those?!)
1 C sweetened condensed milk
1 C semi sweet chocolate chips
1/4 C of chopped peanuts (more or less, optional)
My cookies were pre-cut into 24 squares.  I chopped each in half and dropped the half into a Pam sprayed mini muffin pan.

Bake at 350 for 9 minutes, or until the edges are lightly browned and the cookie is firm.

The great thing is that in the oven, your squares become circles and puff.  Once you take them out, they cave to make the perfect little cups.

Cool for a minute or so before removing from the pan.
While they are cooling, this is the perfect opportunity to make your fudgy filling.

Fill a 2 C (or more) microwaveable measuring cup with 1 cup of sweetened, condensed milk and 1 cup of semi-sweet chocolate chips.  Microwave from about 1 minute, stopping halfway to stir.  Once the chips are completely melted, stir the mixture and place a dollop in each cookie cup.

Move quickly when filling the cookie cups because your fudge will set fairly firm as soon as it cools.  I would try to do the filling all in one setting so you don't have to reheat the fudge and compromise it's makeup.
I wasn't going to chop any peanuts to put on top, but the cookies seemed so plain, and I really wanted people to realize that there were peanuts in the cookies, so I quickly chopped some lightly salted peanuts and sprinkled them on top.  I lightly pressed some into the fudge so that they wouldn't just keep rolling off.

I had a hard time convincing people that I made them myself.  And I really {kind of} did, so I totally deserve the credit.  As does BHG for the original recipe that I only vaguely modified.

Tuesday, March 20, 2012

Peanut Butter Brownie Truffle

 Here's a very simple, fake/home made recipe that will impress EVERYONE.

For Serious.

First off, make a box brownie mix of your choice.  If you want thick brownies with lots of peanut butter on top, make an 8x8 or 9x9 pan.  I was going to feed the masses, so I made a thin brownie layer in a 9x13.

The original pictures look more scrumptious because they're just plain bigger.

While that is baking, mix up your peanut butter mixture.   Butter, PB, milk, and powdered sugar. Very similar to making the PB cups/eggs, but this has a creamier overall consistency.  Much more spreadable.

Then, BEFORE you start the next step, put it in your fridge to harden up.

I didn't think about that step before I continued on.

It's an important step.  Trust me.
 The reason it should harden is that you have all of this peanut buttery goodness all over you pan.  See the picture?  It's like a soft frosting.

If you don't wait for it to harden, like some of us I know, the chocolate will just make a mess when layered on top.  It becomes more of a peanut butter and fudge swirl effect than a solid three layered one.

This isn't a bad thing, it's just, well, a thing.

And it makes for really bad photos.

However, the dessert is delicious, and I highly recommend it.  I used a double fudge brownie recipe with chocolate chips included. Well worth it!