Showing posts with label chocolate. Show all posts

Sunday, March 17, 2013

Bourbon Brownies

Let's start this day off right, shall we?  Let's celebrate a day of revelries with two of my favorite ingredients: chocolate and booze!

In addition to celebrating St. Patrick's Day, let's also celebrate my triumphant return, with a little piece of love, originally called the Bourbon-Brownie Petit Four by Better Home and Garden magazine's test kitchen.  They say you can cut out about 64 brownies from this recipe (being that they're petit fours), but I doubled the recipe and struggled to get that since you don't want them to crumble away to nothing.  Let's say one recipe easily makes 2 dozen, and then you can be pleasantly surprised at anything above and beyond that!

Ingredients (brownie):
1/2 C butter
3 oz unsweetened chocolate, coarsely chopped
1/4 C bourbon
3 T instant coffee granules (I always use a bold roast)
1 C sugar
1 tsp vanilla
3/4 C all purpose flour
1/4 tsp baking soda
Ingredients (glaze and frosting):
1 C whipping cream
6 oz milk chocolate chips
6 oz semi-sweet chocolate chips

Directions:
1. In a medium saucepan, melt and stir the butter and unsweetened chocolate until smooth.  Remove and cool.
2. Preheat your oven to 350.  Line an 8"x8" pan with foil that hangs over the edge for easy brownie removal. Grease the foil and then set it aside.   In a small cup/bowl, combine the bourbon and coffee granules and set aside as well.
3. Stir sugar into your chocolate mixture.  Add eggs, one at a time, beating until just combined.  Then, stir in your vanilla and the coffee bourbon mixture.
4. In a separate bowl, stir together flour and baking soda.  Add to the chocolate mixture, stirring until just combined.  Spread batter evenly into your prepped pan.
5. Bake for 30 minutes, then cool on a wire rack. Lift brownies out of the pan.  You can cut off the edges at this point, or leave them if you'd prefer.  I cut mine off (as recommended), but the edges weren't so crusty that I think they would've ruined my squares.
6. Cut brownies into 1" or 1 1/2" squares.  Coat with Semisweet chocolate glaze (see following recipe).
7. Top each glazed brownie with piped Milk Chocolate Frosting rosette (see following recipe).

Glaze and Frosting Directions:
1. In a medium saucepan, bring whipping cream just to boiling over medium high heat. Remove.
2. For Milk Chocolate Frosting, transfer 1/2 C of the cream to a small bowl and add milk chocolate chips - DO NOT STIR.  Let stand for five minutes, and then stir until smooth.  Cover loosely, then chill for about 2 hours, beat with an electric mixer until fluffy, then bag and pipe.
3. For Semisweet Chocolate Glaze, take warm cream and stir semisweet chips in until smooth (helps if you're doing this in the hot saucepan, then glaze over cut brownies.


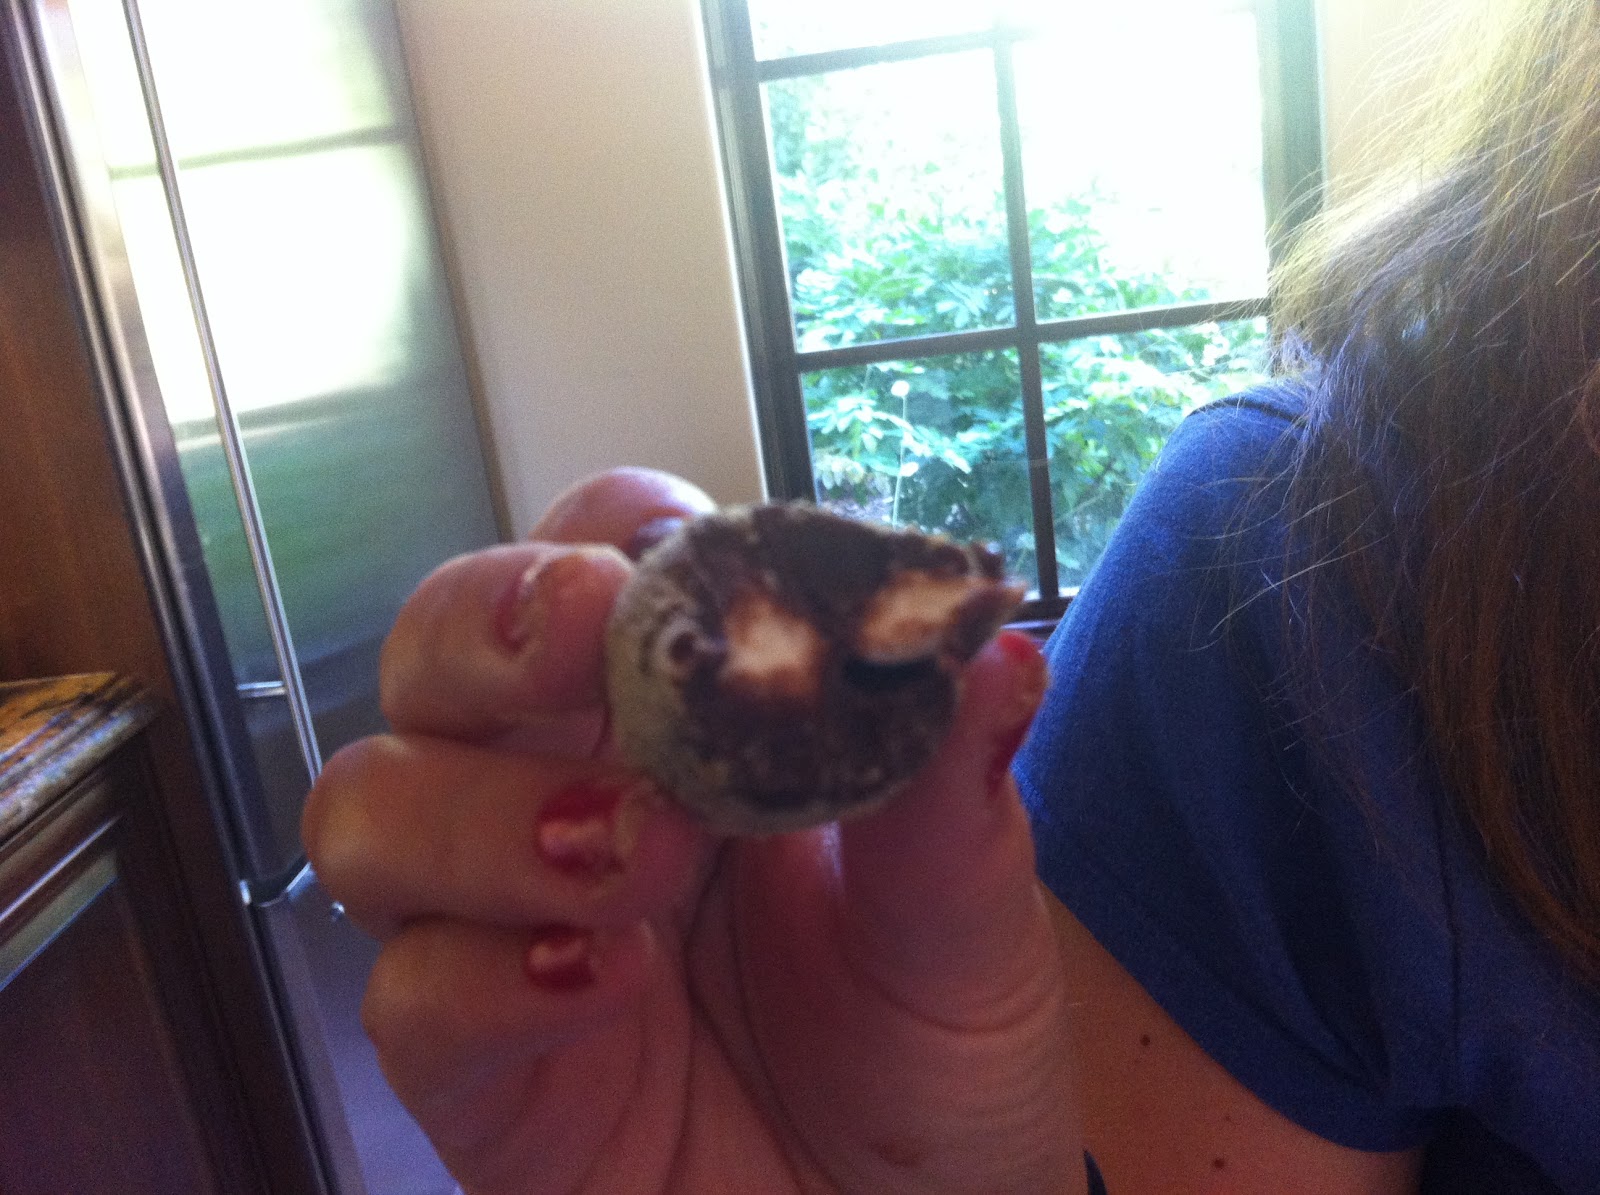
For whatever reason, I was super annoyed with the frosting and chose not to use it.  The brownies were still amazing and no one would've ever guessed you needed frosting to enjoy these.  So rich and decadent, and while you could detect the hint of bourbon, it wasn't overwhelming.  More people noticed the hint of coffee than the liquor in the brownie.

Monday, December 3, 2012

Chocolate Peanut Butter Pretzel Bites

Holy AMAZING, Batman!

If you're looking for a simple dessert that is both sweet and salty, I've found your kryptonite.  Or your salvation.  I guess it depends on which comic we're reading because now I'm confused!  ;)

Ingredients:
2 C creamy peanut butter, divided
3/4 C butter, softened
2 C powdered sugar, divided
4 C broken pretzel twists, divided,
2 C semi sweet chocolate chips, divided
Directions:
1. Line a 9"x13" baking pan with foil and a little overlay.  Lightly spray with a non-stick cooking spray.
2. Beat 1 1/4 C peanut butter in and butter in a large bowl until creamy.  Gradually beat in 1 C powdered sugar.
3. Stir in remaining 1 C of powdered sugar, 3 C of pretzel pieces, and 1/2 C of chocolate chips.  Press evenly into prepared baking pan.
4. Microwave remaining 1 1/2 C chocolate chips and 3/4 C peanut butter on medium, uncovered, in a microwave safe bowl for 45 seconds.  Stir. If necessary, return for 10-15 second intervals until completely melted.
5. Spread chocolate peanut butter evenly over pb/pretzel/powdered sugar layer.
6. Top with remaining pretzel pieces, pressing down gently into the chocolate layer.
7. Refrigerate at least three hours, or until firm.  Lift out of pan and peel off foil, then cut and serve.

Wednesday, November 21, 2012

Fall Munch Mix


Cause, you know, for kids!!  I found a similar recipe on Pinterest, but when I went shopping, I just became inspired by all of my choices.  Turns out you can really throw most anything in here and it'll probably taste okay.  I made two ginormous cauldrons of this mix, but here is the recipe for just one large cauldron...

Ingredients:
1/2 box of Kellogg's Krave cereal
1/2 box of Cinnamon Life cereal
1 large bag of caramel corn
1 large bag of kettle corn
1/2 bag pretzel sticks
1/2 bag mini pretzel twists
2 bags of 'autumn mix' candy pumpkins and candy corns
1 box of chocolate Teddy Grahams
2 king sized bags of M&Ms (plain)
2 king sized bags of Reese's Pieces (optional, dependent on allergies)

Directions: Mix together and serve!

Everyone (adults and kids) adored this mix.  It was the right combo of salty and sweet, and it saved me from serving other kid-friendly desserts and sweets (even though I did mini cupcake it up, per usual).

Tuesday, September 18, 2012

Chocolate Mint Triangles

Okay, so back in the early days of my blog.

Really early, like May 2011, y'all, I made a post about After Dinner Mint Triangles.

It didn't turn out well that first time.  Tasty?  Yeah, you betcha.  Pretty?  Not so much.

This time, I put in my best girl, Ashton, on it, and she made that recipe work!


Ingredients: (Crust)
2 pkg Grasshopper Cookies (or Thin Mints),  finely ground
1 stick of butter (1/2 C)
1 1/4 C semi-sweet chocolate chips

Ingredients: (Topping)
10 oz vanilla almond bark (or candy coating)
8 oz cream cheese, softened
1 tsp peppermint extract
8 drops of green food coloring
1/4 C semi-sweet chocolate chips
Directions: (Crust)
1. Melt the butter and chocolate together in the microwave, stirring every 30 seconds until smooth.
2. Mix with finely ground Grasshoppers.  (Sounds gross, but they're cookies, not grasshoppers...)
3. Press into a non-stick foil lined 9x13.  (We doubled the recipe, so we used a huge cookie sheet.)
4. Initial your work and be proud of it!
4. (for reals) place in the freezer while you prepare the topping to help it solidify more quickly.
Directions: (Topping)
1. Melt the vanilla bark/candy coating in the microwave, stirring ever 30 seconds until smooth.
2. Using a hand mixer (easiest), mix melted bark with cream cheese, peppermint extract, and food coloring.  More if you'd like it darker, less or none if you don't mind the association of green and mint.
3. Spread the topping over your crust.
4. Melt the chips and drizzle over the top to decorate.
5. Store in fridge until ready to serve.
Tip 1: When you go to cut the triangles, this is when that non-stick foil comes into play.  Use it to lift out the entire dessert and place it on a cutting board.  This way you won't have the dish in your way, and you won't leave cut marks in the bottom of your dish.

When I was giving this recipe to one of my residents who had really enjoyed the treat, she didn't know how to easily cut the treats into triangles.  I'm not judging, but... Tip 2: Cut it into long strips, then make each strip into squares, then cut each square diagonally to create triangles.

omnomnomnom!

Wednesday, September 12, 2012

PB Chocolate Banana Bites

Ready for an awesome snack or dessert that can make your day?

So simple, and it's only three ingredients.

THREE!!

Kasie!
Ingredients:
Bananas
Peanut butter
Chocolate Chips

Directions:
1. Slice bananas into 1/4" slices.
2. Place about 1 tsp of peanut butter on one banana slice, and cover with a second slice, creating a sandwich.  (More or less, depending on preference)

3. Melt chocolate chips (about 1 c at a time) in the microwave, stirring every 30 seconds until smooth.
4. Dip PB banana sandwiches in the chocolate.  My lovely assistant of the day, Kasie, found it easiest to hold each sandwich on a fork (resting on top, not pierced) and then use a spoon to drizzle the melted chocolate on top.
5. Stick in freezer on parchment paper until ready to eat.


While these didn't turn out pretty, once they came out of the freezer, they looked more 'normal', and it didn't matter much, since everyone devoured them.

Literally.

DEVOURED.


Thursday, September 6, 2012

S'moreful September: S'mores Cupcakes

I'm not going to lie, this is the recipe I was waiting for.  It was the whole reason that I decided to celebrate National S'mores Day, and the reason that I will probably continue to celebrate every year after this one.

I do love this recipe from start to finish, and (as you well know) any time that I can use a box mix while creating a full recipe, it's a good day.  There's something about saving those middle steps that really appeals to me, especially when I know I love that particular brand or flavor.
Ingredients (bottom/crust layer):
1 1/2 C finely crushed graham crackers
1/4 C sugar
5T unsalted butter
2 oz bittersweet chocolate, finely chopped
about 200 mini marshmallows (less than half a bag)


Directions (bottom/crust layer):
1. Preheat oven to 350 degrees and line 24 muffin tins with paper liners.
2. Mix graham crumbs and sugar in a microwave safe bowl.  Top with butter and microwave until melted.  Stir well to mix the butter throughout.
3. Place about 1 T of crumb mixture into each muffin cup, and press down (I used the bottom of a cup).
4. Bake for 5 minutes.  Remove then top with a tsp (or so) of chocolate pieces and 4-7 mini marshmallows.

Ingredients (cupcake layer):
1 box of favorite chocolate cake mix
all related ingredients for cake mix (eggs, oil, water, etc.)

Directions (cupcake layer):
1. Mix all necessary ingredients for box mix.
2. Add to top of bottom crust layer in each paper muffin cup.
3. Bake according to box mix directions, but watch closely as it goes a little more quickly.  Remove and let cool.

The frosting was so heavy it broke our cheap hand mixer!
Ingredients (frosting layer):
1/4 C butter, softened
1 jar (7oz) marshmallow creme
1 tsp vanilla
16 oz powdered sugar (or less)
1-2 T milk

Directions (frosting layer): ***
1. Hand/machine mix butter, marshmallow creme, and vanilla until well blended.
2. Gradually add sugar, beating after each addition until well blended.
3. Add in 1 T of milk and blend.  Add more milk, if necessary, for desired consistency
4. Top your cooled cupcakes with the frosting.
5. Lightly brown in broiler or with kitchen torch.

So, as you see, the frosting and I didn't get along.  If you look here, the frosting was supposed to be pipe-able.  Yeah, that totally didn't work, and trying to lightly brown it made it even worse!  The cupcakes tasted amazing, but I blew out a hand mixer on the frosting and it went down hill from there.  Hand mixing the heavy marshmallow frosting was very difficult (as my hand mixer obviously doth protest too much) and it didn't firm up as needed.  In the end, sure, it looked like a melted slice of provolone, but it tasted amazing.  Next year, I'll have to play with it to see how it goes.
My assistant thought this was a good form of 'decorating'.

Sigh. Well, it was a great S'moreful beginning to this September, and I had a blast with National S'mores Day.  And?  The greatest part about Pinterest?  There are a ton more s'more recipes to be had for next year.

Score!

Wednesday, September 5, 2012

S'moreful September: S'mores Truffles

I was very dubious of this recipe.  In fact, I might still tweak it, if given the opportunity to make it again.  I'll let you be the judge, but I think that A) this recipe doesn't make enough truffles and B) there should be a way to put a large marshmallow in there, even if it's cut in half.  Marshmallows make the s'mores, in my opinion.

That being said, these do taste really great, and if you're up for rolling truffles, you should definitely give this recipe a try!

Ingredients:
2 T unsalted butter
1/2 C heavy cream
2 C milk chocolate chips
24+ mini marshmallows
1 C finely crushed graham crackers


Directions:
1. Melt butter in a medium sized pan over medium heat; whisk in cream and bring to a boil.
2. Remove pan from heat, and stir in chocolate chips until melted smooth.
3. Chill pan in fridge for at least 1 hour.  (My fridge wasn't a fan and it took nearly 2 hours.)
4. Roll 24 mini truffles, stuffing at least 1 mini marshmallow into the center of each.
5. Roll truffles in graham crumbs, then place back in the fridge to chill until serving.


Monday, September 3, 2012

S'moreful September: PB S'more Brownies

It was only a matter of time before peanut butter was added to this mixture.  This recipe appeals to me for its simplicity, and the way you combine the peanut butter into the mixture to make you feel better about your life.  It's protein, it's healthy, right??

Ingredients:
1 box of your favorite brownie mix (plus it's ingredients, usually oil, eggs, and water)
1 jar (7.5oz) of marshmallow creme
1 C of your favorite creamy chocolate frosting
1 C of your favorite peanut butter

* See how this recipe is bound to be your favorite?  Three of the ingredients are your own personal favs!*


Directions:
1. Make, bake, and cool your brownies in a greased 9"x13" baking pan.  Usually the recipe calls for up to
a 8x8 size, so this will bake in less than half that allotted time.  Watch the brownies, use a toothpick.  You should know what you'd like your brownies to look like.
2. Drop spoonfuls of the marshmallow creme on top of the cooled brownie.  Lightly spread the fluff around.
3. Melt the frosting in a microwave safe bowl.  Pour and spread over the fluff.

4. Melt the peanut butter in a microwave safe bowl.  Pour and spread over the chocolate.
5. Using a knife, spread around the chocolate and peanut butter to marbleize it.
6. Cool in the fridge until more firm.  Cut and enjoy!

OH SO GOOD!!!

Tuesday, August 28, 2012

Salted Caramel Butter Cream Double Chocolate Cupcakes

The original recipe for these amazing cupcakes can be found over at Sweet Bliss Bakery. As soon as I read it, I knew I had to make it.  The problem was finding an excuse to make cupcakes.

Odd, huh?

For the cupcakes, your ingredient list includes...
Chocolate cake box mix (your favorite)
3 eggs
1/2 C melted butter
1 C water
3 Tbsp cocoa powder (Dutch processed)
Directions:
1. Mix ingredients.
2. Place in paper lined muffin tins (1/2-2/3 full)
3. Bake at 350 for 15-20 minutes.
4. Cool for 5, then remove from tin to finish cooling.

Caramel Ingredients:
1/2 C sugar
2 T water
1/4 C heavy cream
1 1/2 t vanilla
Directions:
1. Bring water and sugar to a boil, in a small pan on med-high heat.
(I only had a very large pan, making this nearly impossible)
2. Have your cream and vanilla ready to go as your working.
3.Once sugar water boils, leave it be (NO STIRRING) for 5 minutes.
4. Remove from heat, and slowly mix in cream and vanilla.  It will froth, so be careful!  Mix until completely smooth.
5. Set aside to cool.


Butter Cream Ingredients:
1 C butter, softened
4 C+ powdered sugar

Directions:
1. Cream butter in a medium bowl
2. Slowly add powdered sugar to desired consistency.
3. Add in cooled caramel and blend to desired smoothness.  If you need to, add more powdered sugar.

Additional, Optional, Toppings:
Caramel Sauce (Smuckers, Hersheys, or your favorite local sauce)
Chocolate shavings or curls.  I just used my small cheese grater and Bakers semi-sweet chocolate.


Saturday, July 7, 2012

Mexican Hot Chocolate Cupcakes

What better way to round up a Mexican Fiesta than with a "spicy" chocolate cupcake?

I found the original recipe here.
Ingredients:
For the cupcakes:
2 cups sifted cake flour (I substituted white rice flour to make it gluten free)
1/2 cup unsweetened cocoa powder
1/2 teaspoon ground red pepper flakes (add more if you like it spicier.  I omitted it all together)
1 cup sugar
2 teaspoons baking powder
1 teaspoon vanilla
2/3 cup vegetable oil
2 large eggs
1 cup milk
-
For the ganache:
6 ounces (170 g) good dark chocolate, chopped
1/2 cup (146 g) Nutella
3 Tablspoons (43 g) unsalted butter
2/3 cup (158 ml) heavy cream
1 teaspoon ancho chili powder
-
For the frosting:
1 teaspoon ancho chili powder
1/8 teaspoon cayenne pepper
1/2 teaspoon ground cinnamon
2 cups confectioners’ sugar (original recipe calls for 4 cups)
1 package, 8 ounces (228 g) cream cheese, at room temp.
8 Tablespoons (114 g) unsalted butter, softened
1/2 teaspoon (2.5 ml) vanilla extract, clear
cinnamon sticks for decoration (optional)

Directions:
For the cupcakes:
Preheat oven to 375F. Grease and flour 24 muffin cups, or use paper baking cups.
Mix and sift flour, cocoa, sugar, pepper and baking powder together into a bowl. Add oil, vanilla, eggs, and milk; beat for 30 seconds with a mixer at low speed, scraping the bowl frequently. Beat for 7 1/2 minutes more with a stand mixer at medium speed or 6 minutes with a hand mixer at high speed, scraping the bowl 4 – 5 times.
Pour batter into pans. Bake for 15-18 minutes or until a toothpick inserted in center comes out clean. Remove muffins from oven and cool in pans for about 12 minutes. Remove muffins from pans and finish cooling on a wire rack.  Then, I used the tip of a teaspon to cut out the middles of the cupcakes for a place to fill in the ganache.

For the Ganache:
Take all ingredients and melt them in the microwave (about 45 seconds), stirring at least once.
Fill the cupcake using a small spoon with ganache until the ganache reaches the rims of the top of the cupcake.
The cupcakes are now ready to be frosted.
For the frosting:
In a bowl sift together the chili powder, cayenne pepper, cinnamon and confectioners’ sugar. Set aside.
In a stand mixer with the paddle attachment beat the cream cheese and butter on medium speed for about 4 minutes.
Mix in the vanilla extract.
Add the sugar mixture to the cream cheese mixture and mix together.
The frosting is now ready to be piped onto the cupcakes. Use a bigger tip for bigger swirls. Decorate with a cinnamon stick .

Thanks to my MIL for modeling her cupcake!

Wednesday, July 4, 2012

Happy Fourth of July!

 Let freedom ring my friends!

Today, at least in my case, that means not doing a red, white, and/or blue themed post.  It means I have the right to choose what I post about.  I mean, this is America, right?  We like to stand behind our rights, so that only makes sense.

And, actually?  I just don't have any red, white, or blue themed recipes that I want to share at this moment.  But, what I do want to share is awesome, just the same.
 Today, we're talking about Chocolate Cupcakes with a Peanut Butter-Cream Frosting Dipped in Chocolate.

Yes, those capital letters were absolutely necessary.  I feel as though I should be yelling how much I LOVE THIS RECIPE!!!  But, let's try to keep ourselves contained, at least a little bit, right?

First off, start with your favorite chocolate cupcake base.  I really love the base I used for the Oreo cupcakes (minus the Oreo). You could use your own favorite or even a box mix.  I won't tell.
 To me, the glory here comes in the top half of the cake, so that's what I'm going to focus on.

Peanut Butter Cream Frosting Ingredients:
1/2 cup granulated sugar2 large egg whites
1/8 teaspoon salt
12 tablespoons softened unsalted butter,
cut into 1/2-inch pieces
1 cup peanut butter
2 teaspoons pure vanilla extract
* this only covers about 12 cupcakes *


 Directions:
1. Combine sugar, egg whites, and salt in bowl.
2. Set bowl over pan of simmering water. Gently whisk until mixture registers 160 degrees F on instant-read thermometer. (I just went until it's warm to the touch).
3. With whisk attachment on your mixer, whip on medium-high speed until mixture resembles consistency of shaving cream.
4. On medium speed, add butter one piece at a time, until combined and creamy.
5. Whip in peanut butter and vanilla, and beat until smooth.
6. Using a zip lock bag, or a nice frosting bag and tip, pipe on that frosting, and let it go high.  Looks aren't necessarily important since all imperfections will be covered with the chocolate dip.  You could also just stop here and have a great recipe for PB Cream Frosting on Chocolate cupcakes, but why stop when you know it can only get better?
7. Place frosted cupcakes in the fridge for at least an hour to let the butter cream harden.


Chocolate Dip Ingredients:
8 ounces semi-sweet chocolate chips
1 1/2 tablespoons vegetable oil
* this only covers about 8-12 cupcakes *

Directions:
1. Melt chocolate and oil together (in microwave or through a double boiler approach)
2. Dip cold cupcakes directly into the chocolate.  It helps if you have a tall, relatively skinny container for the chocolate. Cover all of the butter cream frosting.
3. Let harden in fridge and enjoy!

Wednesday, June 20, 2012

Cheesecake in a Jar!

There have been a ton of posts on Pinterest lately that have included cooking in Mason jars.  Obviously, I loved creating a cocktail in one, why not cook??

I'm not a huge cheesecake person, but I love chocolate and peanut butter, so when I found this recipe for a peanut butter cheesecake on an Oreo crust with a Nutella topping, I was sold!

So, first of all, start with 12 (4oz) mason jars.  (And, yes, they are oven safe.  My mother pestered me, worried, several times over about this.)
Oreo Crust Ingredients: 
16 Oreo Cookies, ground in a food processor
3 Tblsp Butter, melted
Pam Baking Spray (spray all jars with it)

Peanut Butter Cheesecake Ingredients:
12 oz Cream Cheese, at room temperature
7.5 oz container Creme Fraiche (or sour cream)
3/4 Cup Sugar
2 Eggs
1/4 Cup Heavy Whipping Cream
1/3 Cup Peanut Butter
1 tsp Vanilla Extract

Nutella Topping:
1/2 Cup Nutella
1/4 Cup Heavy Whipping Cream   
Crust Directions:
1. Decimate the Oreos in a food processor, and place in a separate bowl.
2. Melt butter and then drizzle over the Oreo crumbs.
3. Mix well.
4. Divide the Oreos among your Pam-ed jars, then press the crumbs down firmly.
5. Place the jars in a lipped pan, and then place them in the fridge to chill out (literally) while you make the cheesecake.

*For those gluten free-ers, just omit the crust.  Still amazing!
 Cheesecake Directions:
1. Preheat your oven to 325 degrees.
2. Using your mixer, blend the cream cheese, creme fraiche/sour cream, and sugar until smooth.
3. Add the vanilla, cream, and peanut butter, and beat until smooth.
4. Beat in the eggs one at a time until just blended.
5. Add your cheesecake filling to your prepared crusts.  I filled mine up to the threads (where the lid screws on).
6. Fill the pan that your jars are sitting in with water.  The jars should have between 1/4" and 1/2" of water surrounding them (basically enough to cover where the crust is).
7. Bake your cheesecakes for about 30 minutes.
8. Remove from the oven and onto a cooling rack or safe surface to help them cool.
9. Once the jars have completely cooled, you can put the lids on and transfer them to your fridge.


From there, they can sit for a night or more.  There's something about time in the fridge that generally helps cheesecakes
The cheesecakes rose nicely in the oven, but they did settle back down as they cooled, leaving enough space for the topping.

I made my cheesecakes on a Friday morning and didn't take them out of the fridge until Sunday morning.  They were perfect.

When you're ready, put the Nutella (1/2C) and heavy whipping cream (1/4) in a microwave safe bowl/measuring cup.  Zap it for a minute or two, stopping twice to stir it.
Once the Nutella and cream have combined for a tasty topping, add it to your cheesecakes, filling the jar the rest of the way.  Then, return to the fridge to set until you're ready to serve up these delicious bad boys.

I left a slight gap at the top so I could place a cupcake cover over the top as a lid before closing the ring around the jar.

These are the perfect size for a picnic, or an individual portion for yourself for days to come!

Literally.  I ate one a day for about 5 days.  AMAZING.
Post-lunch snack at my desk!