Monday, October 31, 2011

Happy Halloween!

What I really wanted to make was Dark Chocolate Graveyard Pots de Creme.  Then I thought about making 45 servings of it and I freaked.

Turns out that Jello Instant Chocolate Fudge Pudding will calm you when you need it.  even if you're making  8 boxes of it.  (Yikes!)


You kind of also need to have an office slave assistant who is willing to take the cream out of your Oreos (one at a time), so that you can also have her nicely mash said Oreos without all of that nasty cream getting in your way!


You'll also need an assistant to write RIP on your tombstones (in this case, Sandies shortbreads).  Since this labor is (technically) free, you will be grateful no matter how they turn out.  It's the thought that counts!

Then, insert a layer of pudding into your serving cups, followed up the Oreo "dirt", a tombstone, and maybe a fake flower or skeletal arm to make people pretend that it truly is a graveyard.

Or not.  However, for a tasty dessert, people will certainly humor you to get at that pudding!

Saturday, October 29, 2011

A Taste of Sweetness Saturday: Pumpkin Dip

Super simple recipe - located here.

Three ingredients, mix together.  Serve with Nilla Wafers and graham crackers.  Easy peasy, and even if you're not a pumpkin person, you'll probably love this!
I'm not a huge fan of working with marshmallow, even if it's the "creme."  I always use a mixer so I don't get all sticky, but even still I seem to find it on my arm, in my hair, and in places I least expect it!  Doesn't matter, though, because I could eat this ALL DAY!

Wednesday, October 26, 2011

Breadstick Bones and Cheesy Fondue

 Buy the bread sticks.  Roll them out, and cut them in half.  Each package makes 12, but cut them the short way and make 24.

Then, take your little shorty stick, and roll it out into a five inch "snake."
Then, knot each end, like you're tying off a balloon.  Obvious, this makes it look like a bone.

For added flavor, use the green shaker of Parmesan cheese.  I used the three cheese flavor (Parmesan , Asiago, and Romano - I think).  Just put some in a bowl, and roll the bones in the cheese.  Then, place it on a greased cookie sheet.  GREASED.
Finally, cook at 375 for about 8 minutes, or until they look nicely puffed.  They don't really brown, but when you look on the bottom, they definitely look done, so you'll know!

You could serve these with just about anything, but we made an apple cider cheese fondue to go with them.  Delish!

Monday, October 24, 2011

Bandaged Fingers!

Everyone knows about Pigs in a Blanket, right?  Well, for Halloween you could call them bandaged fingers or little mummies, whatever your imagination allows...  I decided to go with Bandaged Witches Fingers and serve with a nice Bloody Sauce.  They were delicious!

For the fingers:
1 pkg. of Lil' Smokies - I chose the ones with cheddar inside.
1 (or so) pkg of crescent rolls.  (Not to be confused with croissants, I have learned!)

Using your pizza cutter, slice the rolls into strips.  Roll them around the Smokies, and cook according to the Crescent Rolls package suggestion.  I think we ended up cooking them at 350 for 8 (or so) minutes.  Keep an eye on them, and take them out when they turn golden.

For the bloody sauce...

Use 1/2 cup of ketchup with 2 tablespoons of Cider Vinegar and 4 tablespoons of brown sugar.  Mix well.  For a thinner consistency, use more vinegar, for thicker, use more ketchup.  It has a sweet bite that is amazing with the Fingers.  Dig in and enjoy!


Saturday, October 22, 2011

Taste of Sweetness Saturday: Easiest Cookies EVER!!

Okay, so I know I did a chocolate chip cookie post before...  And not that long ago, either!  However, I was doing a little research for work, and was looking at corporate recipes.  It happens...

So, I was super excited to find a recipe that involved only two (or more) ingredients.  I know that pre-made cookie dough can have that odd chemically taste, but check this out, I swear, it's awesome!!


First, you take your premade cookie dough.  Any brand or flavor will do, although the corporate site told me that Nestles Tollhouse cookies were the best.  Maybe so, but generic is cheaper.  C'est la vie!

My dough came in 12 chunks.  Divide them in half, and roll them into balls.

Then, lightly press the dough balls giggles lightly into min muffin cups.

Then bake to the minimum that your dough tells you to cook.  It took mine about 12 minutes.
As soon as I took them out of the oven, I used the tip of my teaspon to lightly press the middles back down.  They have puffed up a bit during baking, and I wanted a nice little cup.

As the cookies start to cool (only about a minute) they will naturally fall back down, I just wanted to make sure they still made a divot.
Then, use some flavor of chips.  I used peanut butter, but there are tons of chips out there - butterscotch, dark chocolate, mint, white chocolate, pb/chocolate mixed, white/milk chocolate swirls...  just use your imagination.  Fill up each cookie with as many chips as you'd like.  I ended up using half of my bag of chips on 24 cookies.  Just like when you make PB Blossoms, it's helpful to do this while the cookie is hot.  This way the chips start to melt together, while the top ones still retain their shape if left untouched.
Also, I'm super excited to try this recipe during the holidays.  Yum!!
Just grab your milk and enjoy!!

Tuesday, October 18, 2011

30 Minute Meal - I timed it!!!

Yes, a lot of generics.  Spend your own money!
6:00PM - Grab your ingredients.  

6:02 - Measure the correct measurements for your rice, start the salted water to boil.  (I really love Jasmine rice, but your fav would do well too, I'm sure.)

6:04 -  Heat oil in a large wok or pot.  Once hot, saute your pressed garlic for 5-10 seconds to start releasing the aroma.  Yum!
6:05 - Add your ground beef.  I usually double up the recipe because this also makes for great leftovers.  So, here you'll see two pounds of beef, two bell peppers, an entire head of cabbage (it cooks down more than you'd think), and the appropriate spices.

6:10 - Water boiling yet?  If so, add your rice and turn it down to a simmer.  (Obviously, follow your own directions or use a rice steamer.  Make a plan.)
 6:15 - hopefully by now your meat is nicely browned.  I don't drain it because the liquid (if there's any) thickens later.  At this point, add your cabbage and peppers.  Peppers that aren't green make the best presentation, but I take what's on sale/in the house!  Cook until tender.
6:20 - this picture is before the cabbage cooked all the way down, it was about halfway here.  Once your veggies are tender, add your soy sauce, water/corn starch as directed, and let it simmer for the last ten minutes to thicken your sauce.

6:25 - rice should be done.  Turn off the heat, add some butter (or whatever), fluff it, and let it sit (covered)

6:30 - Serve and enjoy.  :)
6:40, fight your significant other for seconds!!

Saturday, October 15, 2011

Taste of Sweetness Saturday: Mini Pumpkin Cheesecakes!

For this week's Taste of Sweetness, I'll show you the easiest, most amazing recipe for pumpkin cheesecakes ever.  Not only is it ridiculously simple, but it also makes more than enough to earn you more friends than you counted on this fall!

First, the recipe.  Now, I wasn't sure what kind of snaps to get, since there were no Archways (as recommended) at my local grocery store.  I did find two different brands, however.
The fancy, all natural ones were too small, but the generic Nabisco hockey-puck looking ones were perfect! and they tasted good, too.  So, they're the ones that were thrown into the cups.  Perfect, perfect fit!  Now, if you are making these the day of, the crust will be crispy.  However, after a night in the fridge, they will be soft.  Both taste fantastic, just know if you're looking for a harder or softer crust to plan accordingly.  I liked them better softer, but I had a lot of compliments on the crispy, too.  Personal preference reigns.

 The recipe starts by mixing up the cream cheese until fluffy.  I'm used to doing this when you've mixed something in the cream cheese first, but never solo.  As it was, my paranoia ran the show and I spent a lot of time fluffing my recipe at every step.  At least it looked pretty!!
Have I mentioned yet how much I love having assistants at work?!  No wonder chefs can make it look easy.  With enough people working with you, any recipe is a breeze!  To be fair, this recipe really is simple, but when you have an extra pair (or two) of hands, it goes very quickly!!

Yep, this looks like a lot of batter.  Indeed, it is.  The recipe said if you fill up the cakes two-thirds of the way, you'll make 24 mini-cheesecakes.

I filled the first batch that way.  For the second set of 24, I filled up about five-sixths of the way.  Even still, I made 48 cheesecakes, and was giving them away like it was going out of style!   It worked out really well for my work party, but if you're not having 40 people, you may want to think about halving the recipe!!
The puffed up, cracked, and fell, as expected.  I only cooked them for 18 minutes, because they went a lot faster than the recipe said they would.  Just keep an eye on them and make your adjustments accordingly.

Since no one likes cracked cakes, we added whipped cream, and then on the final night we added a dab of cream cheese frosting.  Either way, these are to die for, and they contain everything that makes you think of Fall!
In a word...AMAZING!!!

Tuesday, October 11, 2011

Because everyone is doing it!

So, about a month and a half ago, towards the end of August, I was planning my appetizer/dessert menu for my October wine social at work. I know that's ahead of the game, but I wanted time to find recipes, practice (as necessary), and revise at will. The menu is pretty extensive, but one thing I've been super excited for, are these...mini caramel apples! The looked amazing, sounded easy enough to make (for 50+ people) and I figured they'd get the point across without being obnoxious, right?
Cue my first problem - I couldn't find the correct caramel.  I did find some dip and some wraps.  The website said wraps should work if cut down to size, so no problems there.
I started with one apple, not to be to anxious, and before you know it, I was ballin' out of control.  It was super easy, and I loved eating the leftover apple pieces.  I could get 7-8 of the "big balls" giggles out of each apple, and three teensy ones.


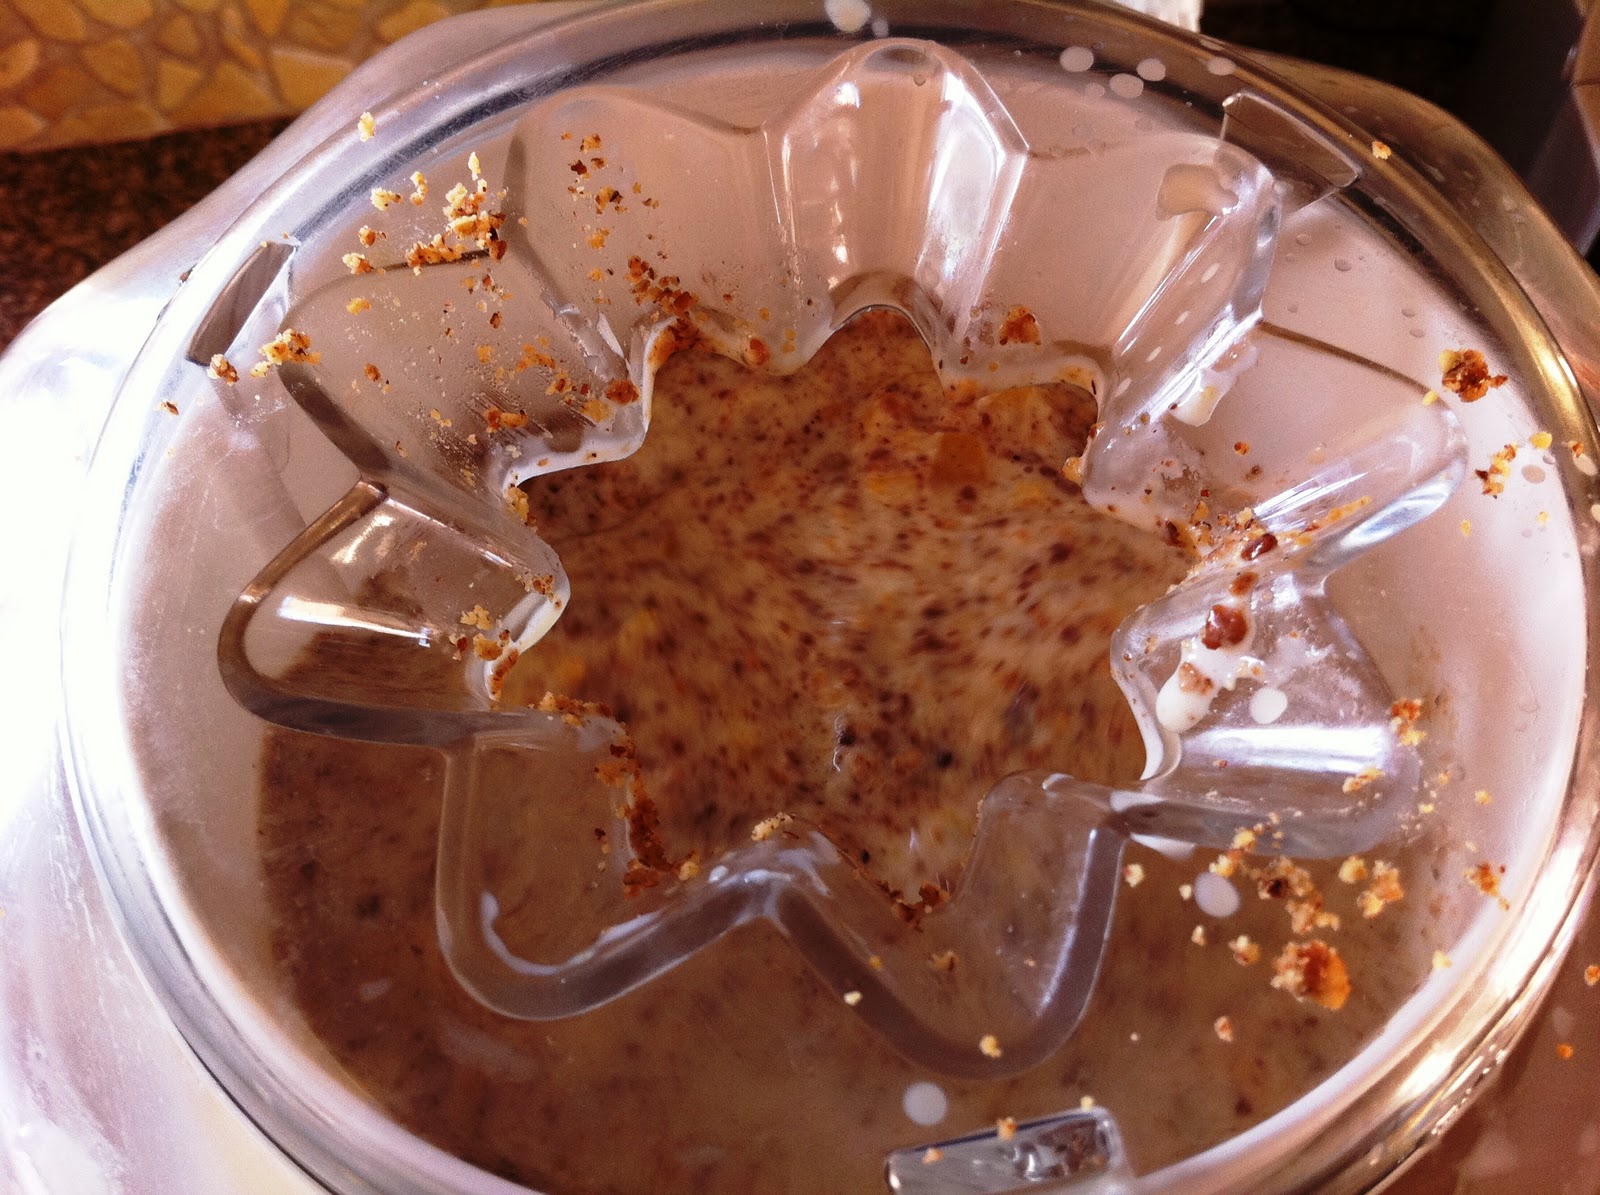
The dip was a long shot.  You can see my first attept on the top of this picture.  The dip was too runny for my purposes, although it did taste amazing.

The wrap was another bust.  The air/apples were too moist and the wrap wouldn't stick to the apple itself.  What little bit did stick, didn't do so for long.  Certainly not long enough to sit on a two hour buffet.

Gross.
The, I decided to wrap from the top down.  In this manner, I could only cut each wrap into four pieces, and then I would sit there and cajole the living caramel out of each wrap until it coated the apple.  With this method, I had the issue of the flat (peel) side being on the bottom, and it was way too labor intensive to make 150+ of these. 

So, I got my office slave assistant to make some phone calls.  She found the Kraft Caramel Squares at the local Walmart.  I beat some granny who was trying to buy her Halloween candy early to get them!

I melted the caramels with the tennsiest bit of water and dipped the apples right in.

Success!!  They looked (and tasted) exactly the way I wanted them too.  Now, the recipe said if humidity is high, (and when isn't it when you're next to the ocean?!) try freezing the apples for a couple of minutes to help solidify the caramel.  I figured if this worked, I could easily just take a few out at a time for my work buffet.
Alas, after ten minutes, they looked melted and gross - and the caramel stuck more to my non-stick pan than to my apples! 

Super bummed.  I'd be interested to see these work, though, because I've since read two different magazines that are featuring them for October, and they say nothing about humidity or issues with the caramel sliding off the apples.

Regardless, this recipe has been scratched from my menu, leaving me with only pumpkin cheesecake and dark chocolate pots de creme for dessert.  I might find a new recipe, but something tells me it's going to come in bulk from Costco!

Keep the faith, my work party is Thursday, so I will start sharing my fall/Halloween recipes as soon as I have pictures of them all.

Saturday, October 8, 2011

A Taste of Sweetness Saturday

You know how, in the Fall, you just want to bake and bake and bake to your hearts content?

I LOVE THAT!

Well, I was reading through a Fall magazine and saw an ad for McCormick's vanilla.  I'm not going to say I use their vanilla, but I definitely used their recipe!!  I was super impressed with this one because it really brought out that melt-in-your-mouth buttery/vanilla richness that accentuates the Ghirardelli's semi-sweet chocolate chips and a HUGE glass of ice cold milk.  AMAZING!!

Okay, enough capital letters and exclamation points.  Here's an incredible recipe for highly addicting chocolate chip cookies that you're going to be sad to run out of when you're done...

Vanilla Rich Chocolate Chip Cookies

Ingredients:
3 ¼ C flour
1 t baking soda
¾ t salt
1 1/3 C butter, softened
1 ¼ C granulated sugar
1 C firmly baked light brown sugar
2 eggs
4 t vanilla
12 oz. (1 pkg) semi-sweet chocolate chips
1 C coarsely chopped walnuts

Sorry for the blurriness!
Preheat oven to 375*.

In a medium bowl, mix flour, baking soda, and salt.  Beat butter and both sugars in large bowl with an electric mixer until light and fluffy.  Add eggs and vanilla, and mix well.  Gradually beat in flour mixture on low until well mixed.  Stir in chocolate chips and walnuts.

Drop rounded tables spoons 2 inches apart onto ungreased baking sheets.

Bake 8-10 minutes until the edges are lightly browned.

Cool on baking sheets for a minute, then transfer to wire racks to cool completely.

Makes 5 dozen.

* * * * *

Okay, so you know that I didn't add the walnuts, but I'm sure if you're a nutty person you'd love these even more.  Also, as you can see, I'm not good on "equal" rounded tablespoonfuls of dough.  Didn't matter.  I honest-to-goodness made exactly 5 dozen cookies.  I shared some, but these were hard to share, even with my darling husband.  He gave them the thumbs up, too, though, so when that fall weather makes you nostalgic and you want to bake, these are an easy crowd pleaser!!

Tuesday, October 4, 2011

Trio of Tapenades

So, for a work party, I decided to make a trio of tapenades.  The new Fall/Winter Pampered Chef Season's best has a focus around tapenades, and I figured they would be perfect for our "Member Mixer."  Now, the problem with these is that I can't find the recipes anywhere online, so please forgive me as I include them here!

By the way - these recipes are awesome even if you don't like olives (like me) or capers.   You can't really taste them.  I actually had to convince a woman that they were in there.  Who knew?!

Spinach and Olive Tapenade

Ingredients:
6 oz (1 pkg) fresh baby spinach leaves
1 lemon
1 oz Parmesan cheese
¼ red bell pepper
2 garlic cloves (peeled)
2 T drained capers
¾ C pitted green olives
¼ C olive oil
¼ t salt

Microwave spinach covered, 2-3 minutes, or until wilted.  Press spinach to the side to “drain,” and blot excess moisture with paper towels and set aside.

Meanwhile, juice lemon to measure 1 T.  Grate cheese, and cut bell pepper into 1” pieces.

Place garlic, capers, bell pepper, and olives into a food processor.  Process until coarsely chopped.  Add cheese, basil, cheese, oil, lemon juice, and salt.  Process to desired consistency.


Roasted Red Pepper & Sun-dried Tomato Tapenade

Ingredients:
½ C sun-dried tomatoes in oil
½ C loosely packed fresh parsley
1 garlic clove (peeled)
1/3 C pitted Kalamata olives, drained
¼ C walnut halves, toasted
2 T olive oil
1 t balsamic vinegar
1 C jarred roasted red peppers, drained and patted dry

Drain tomatoes and microwave 15-20 seconds or until slightly softened.

Combine parsley, garlic, olives, and walnuts in food processor.  Process until coarsely chopped.  Add tomatoes, oil, and vinegar and coarsely chop.  Add peppers and process until desired consistency.
These were the last ones I threw in the oven.  And forgot!!

Artichoke Tapenade

Ingredients:

1 lemon
1 can (14 oz) artichoke hearts in water
¼ C loosely packed fresh parsley
1 garlic clove (peeled)
½ C pitted green olives
1 T drained capers
5 T olive oil

Zest lemon to measure ½ t.  Juice lemon to measure 1 T.  Drain artichokes and pat dry with paper towels.

Combine parsley, garlic, lemon zest, juice, artichokes, olives, capers, and oil in food processor.  Process to desired consistency.


* * * *

I made some crustinis (french bread and olive oil), and grilled some Naan to serve with the tapenades.  I also put out some crackers to round out the starches.  A little bit of something for everyone.  Yummy!
Artichoke, Red Pepper, and Spinach, accordingly

Saturday, October 1, 2011

A Taste of Sweetness Saturday

Okay, so we all know it's the end of summer, right?

Well, the end of summer doesn't really exist in Southern California.  So, while all of my friends back home are making chili, soup, and fresh baked breads, I'm still in my 70* temperatures.  Rough life, right?

Add on to that the Santa Anas that make our October hotter than our July, plus a couple of wild fires, and you'd be ready for ice cream, too!!


Peach and Pecan Ice Cream Recipe

So once again, first we cook it out the stove top.

Okay, so I read through the recipe.

kind of


I seemed to have missed the section where this has to be in the fridge for 8-24 hours before you can even process it.

This is even worse than the last recipe!!!


So, we processed it and forgot about it until after work the next day...

Now, my local Fresh and easy didn't have pecans for me to toast, so I just used a package of candied pecans. Not as many as the recipe called for, but it still was an easy add that got the flavor going.

It worked well for this recipe, even though Thomas protested not having a chocolate ice cream again.

I thought two chocolates in a row would be overkill.

He disagreed.  I stand corrected.
Still yummy, just not chocolate.